The direct answer
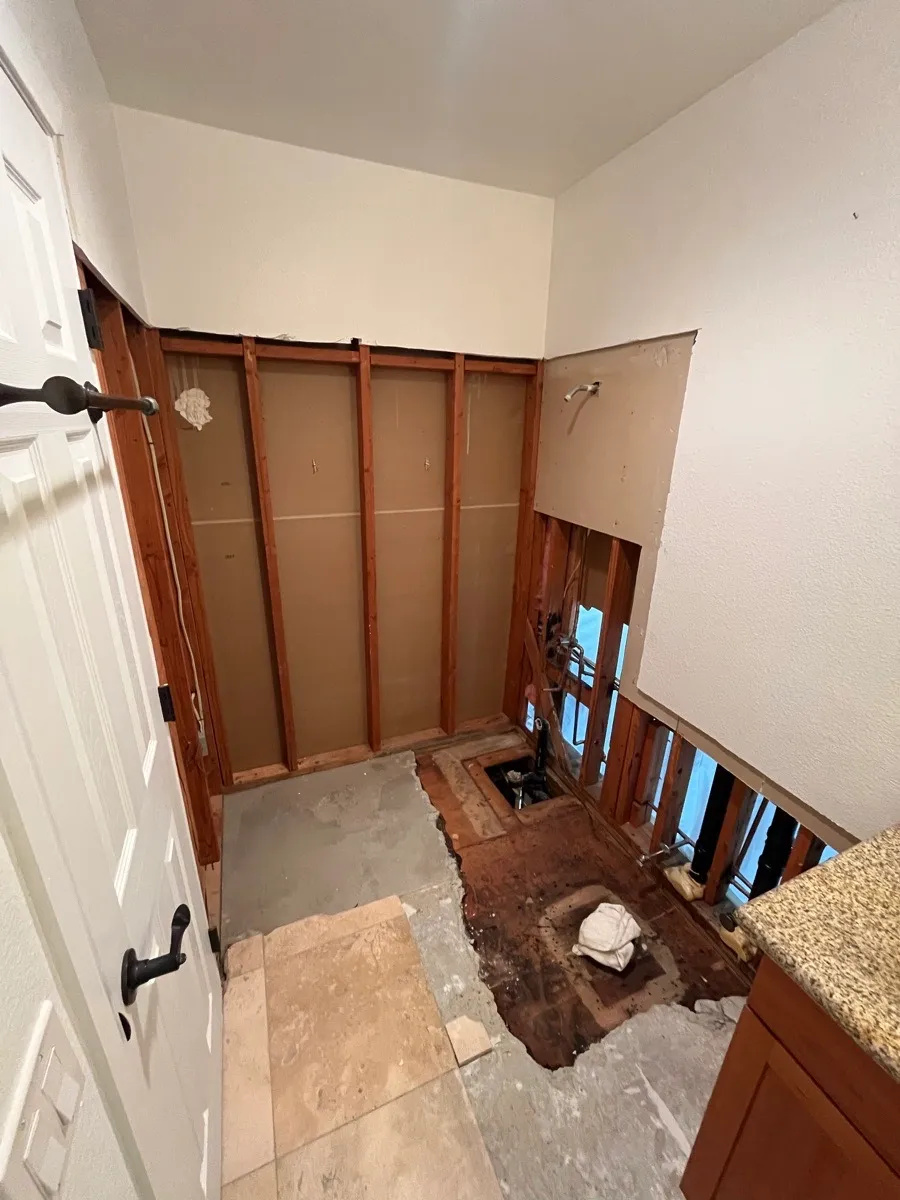
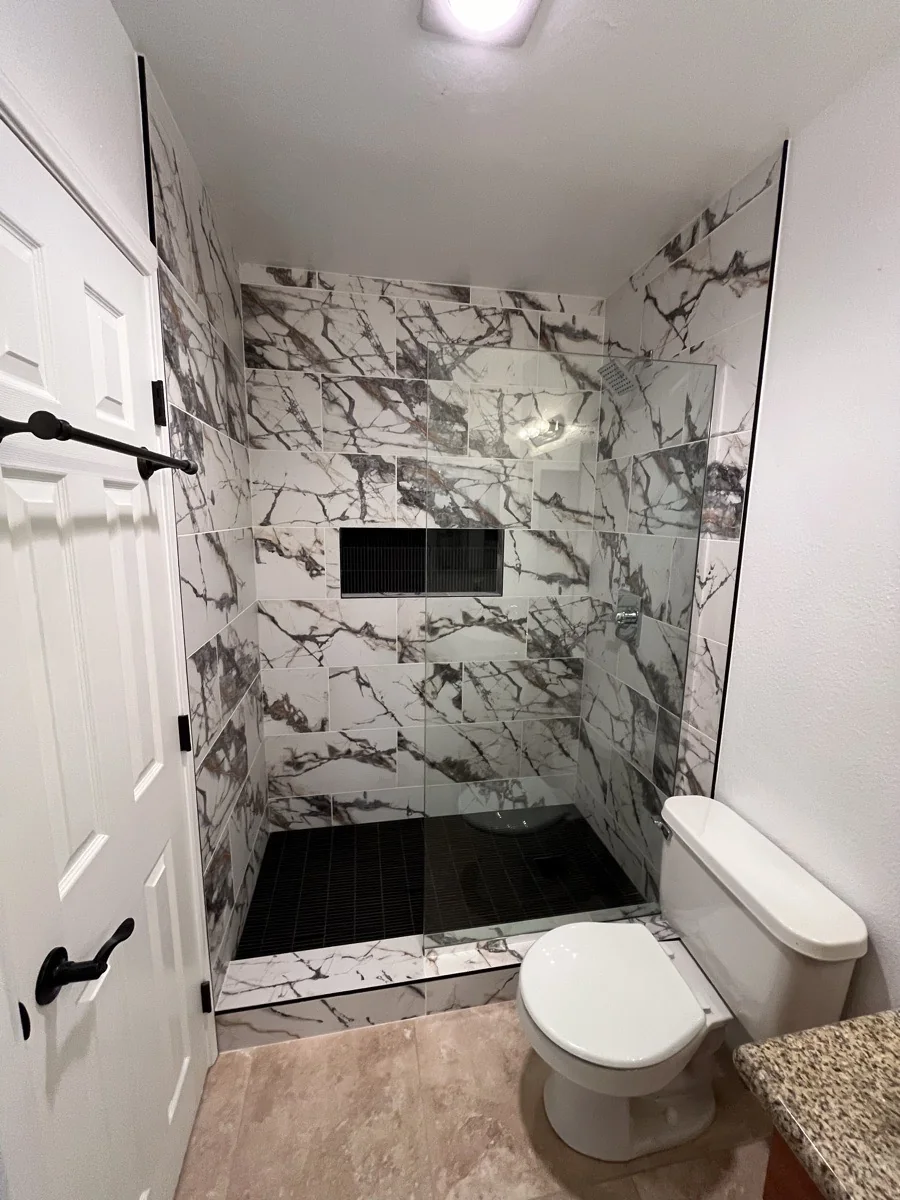
AWC’s published bathroom gallery shows the room opened to framing, piping and subfloor, followed by a finished tiled shower. The sequence establishes those visible stages. It does not establish why the bathroom was opened, the concealed waterproofing system or a test result.
Read the open and finished stages
In the open view, lower wall finishes and the fixture have been removed. Framing, plumbing and areas of subfloor are visible. The later image shows marble-patterned shower tile, a glass enclosure, a black shower floor and adjoining bathroom finishes. AWC groups these photographs under “AWC Bathroom Project: Open Framing and Finished Shower” on its main website.
Define the work between the photographs
That transition is the important planning question for a repair proposal. Which connections are changed? What supporting material can remain? Which backing and water-management details are required? Where does the finished work meet retained tile, flooring, trim or paint? The images give context, but the written scope must answer those questions for the actual property.
Keep the evidence boundary clear
The open photograph does not, by itself, establish a tub leak, rot, mold or structural failure. The finished photograph does not establish a particular concealed membrane, a completed waterproofing test, inspection approval or long-term performance. No project location or customer acceptance is claimed here.
Ask for the actual findings and required checks while relevant layers remain accessible. Manufacturer instructions and applicable requirements belong to the selected assembly, rather than being inferred from its finished appearance.
Use the sequence to compare repair scopes
Put the opening, connection work, supporting-material decisions, water-management assembly, verification and finish boundary alongside each proposed price. A limited connection repair and a surround replacement can address very different work, even when both are described as a bathroom repair.
Request the relevant stage photographs before closure and agree on the change process for hidden findings. That gives the finished-room photograph a clear scope and closeout record behind it.
Sources & further reading
- AWC: published bathroom project gallery
- Schluter: Tiled Shower Waterproofing Systems
- AWC: Drywall Need To Be Opened After A Leak?
Codes, product instructions and local requirements vary by assembly, permit and jurisdiction. Confirm the applicable requirements for the property.
Make the next conversation useful.
Start with a wide view, a close view, when the condition occurs, and what has already been tried. Keep customer names, access codes and unrelated private records out of photos.
Plan the evaluation →